
What does this feature do?
Presidential Circular No. 2025/10 was published on 21 June 2025. It asks many organizations, especially municipalities and public institutions, to make their websites conform to WCAG 2.2 and to the Level A checklist of the Ministry of Family and Social Services. NetSSL takes on both sides of this work:
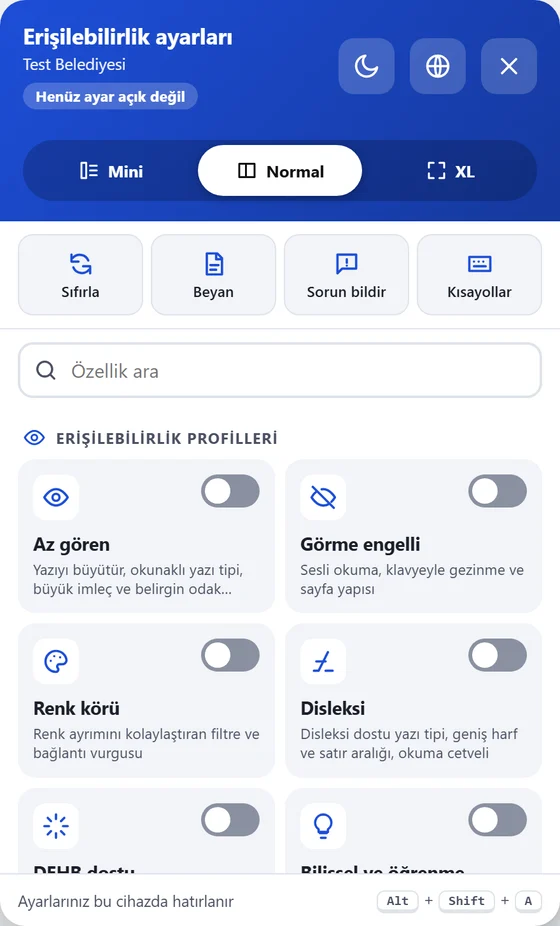
- Visitor side: an accessibility toolbar is added to your site. A citizen with low vision, dyslexia or color blindness, or an older citizen, adjusts the site to their own needs.
- Organization side: your sites are scanned regularly. The Ministry checklist and the accessibility statement are prepared in the panel, and problems reported by citizens are tracked.
Why no code is needed
The toolbar is added to pages while NetSSL serves them. This is what it means for your organization:
- No code is added to your site. Your web developer has no work to do. It works whatever platform your site is built on.
- No external scripts are loaded. The toolbar and its fonts come from your site's own address, through NetSSL. The visitor's browser does not connect to a third-party server, and your content security policy stays intact.
- It does not clash with your site's design. The toolbar runs in its own separate area. Your site's styles do not affect it, and it does not break them.
- Settings stay on the visitor's device. The chosen settings are stored only in the browser. For the panel's usage statistics, only the name of the feature that was turned on is reported, with no identifying information.
- Read aloud runs in the browser. The page is read with the speech engine of the visitor's own browser. The text being read is not sent to any server.
- No separate license is needed. The toolbar, the scan, the checklist and the statement are included in the NetSSL service.
How does a visitor open the toolbar?
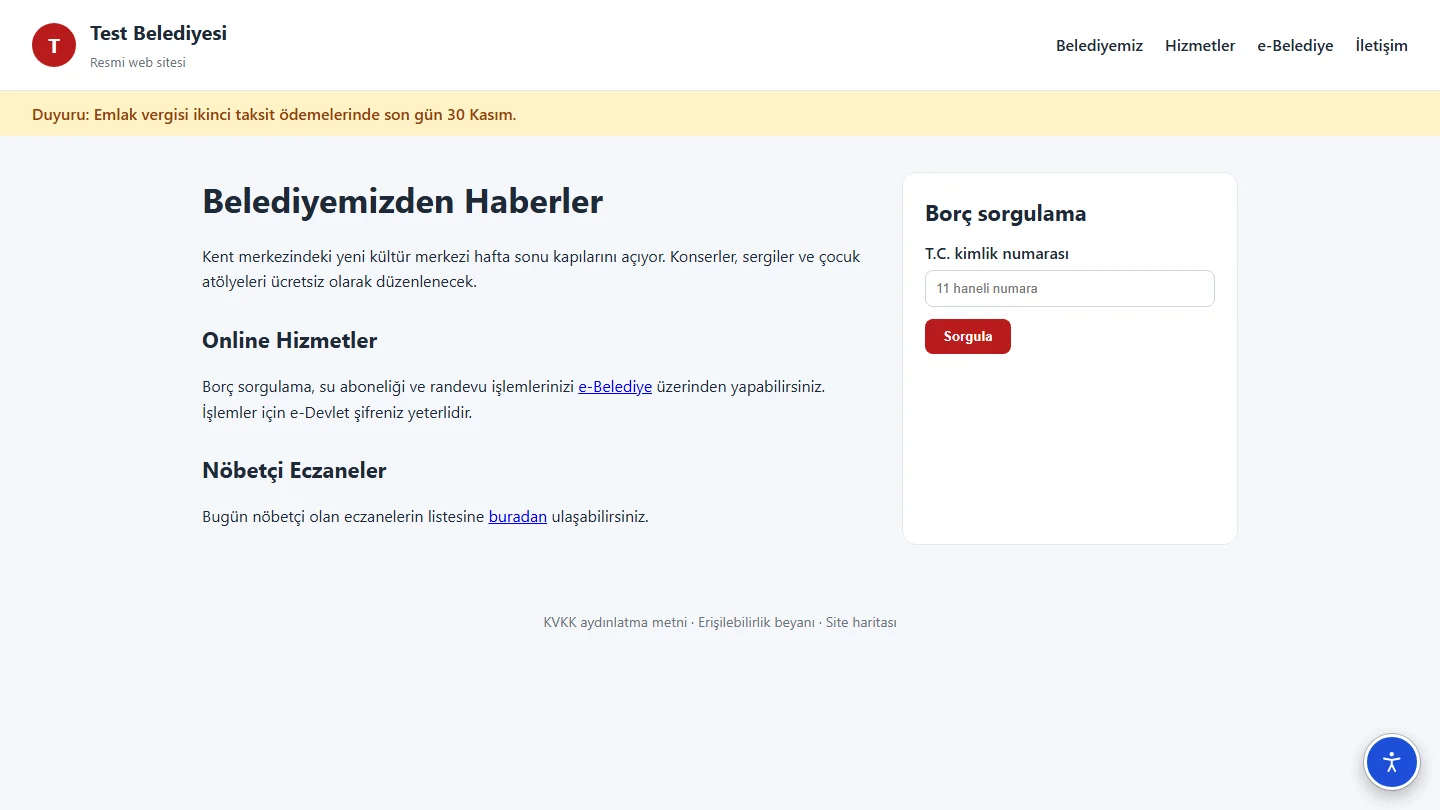
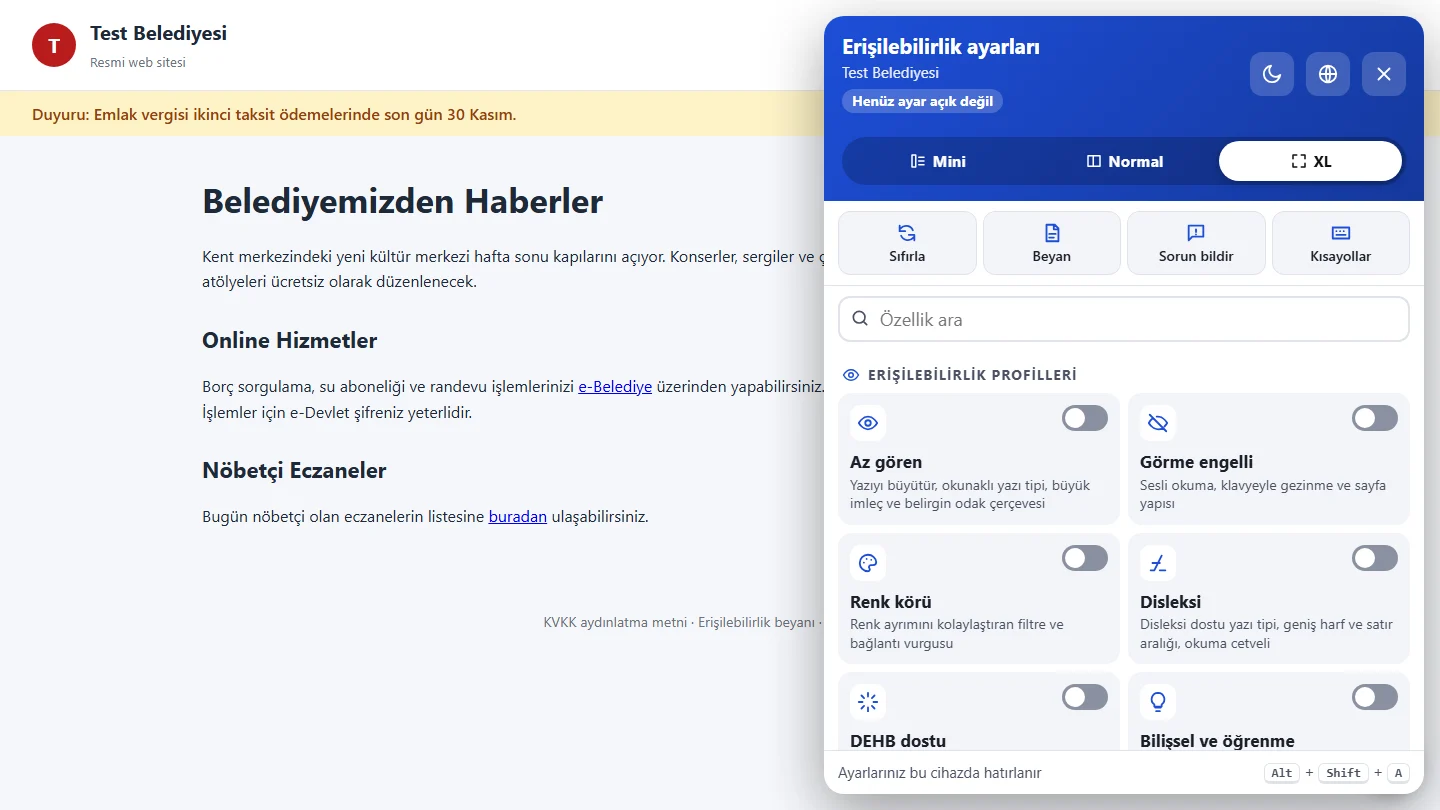
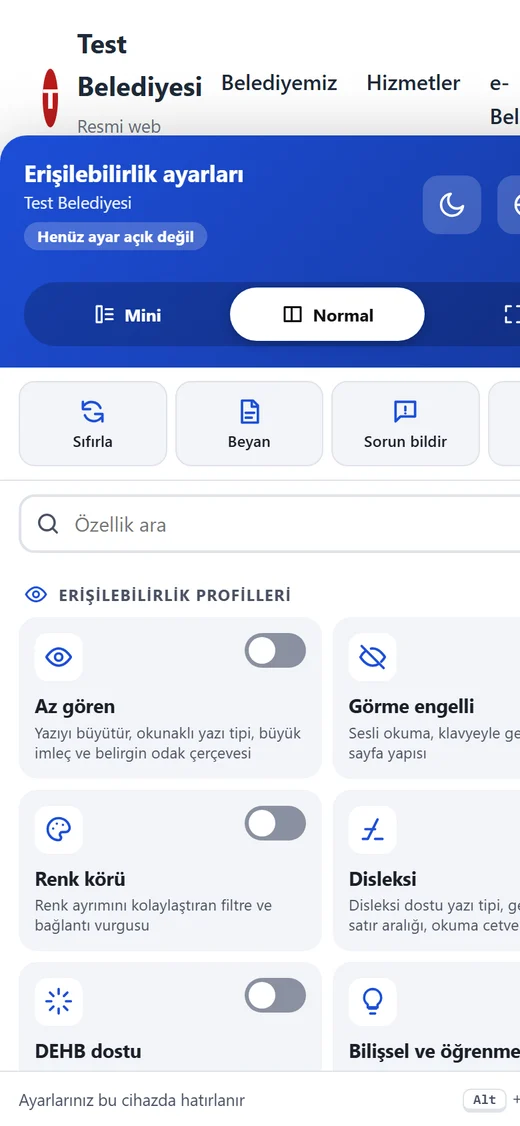
The visitor clicks the accessibility button in the corner of the page or presses Alt + Shift + A on the keyboard. When the menu opens, the visitor first sees the accessibility profiles. A single switch turns on several settings at once.
Accessibility profiles
| Profile | What does it do? |
|---|---|
| Low vision | Bigger text, legible font, big cursor and strong focus outline |
| Blind | Read aloud, keyboard navigation and page structure |
| Color blind | A filter that makes colors easier to tell apart, and link highlighting |
| Dyslexia | Dyslexia-friendly font, wider letter and line spacing, reading guide |
| ADHD friendly | Reading mask, stops motion, softens colors |
| Cognitive and learning | Highlights headings and links, reading guide, simplified view |
| Seizure safe | Stops flashing and moving content, softens colors, mutes sound |
| Keyboard and motor | Keyboard navigation, strong focus, big cursor |
| Older adults | Big text, wider line spacing, big cursor and clear links |
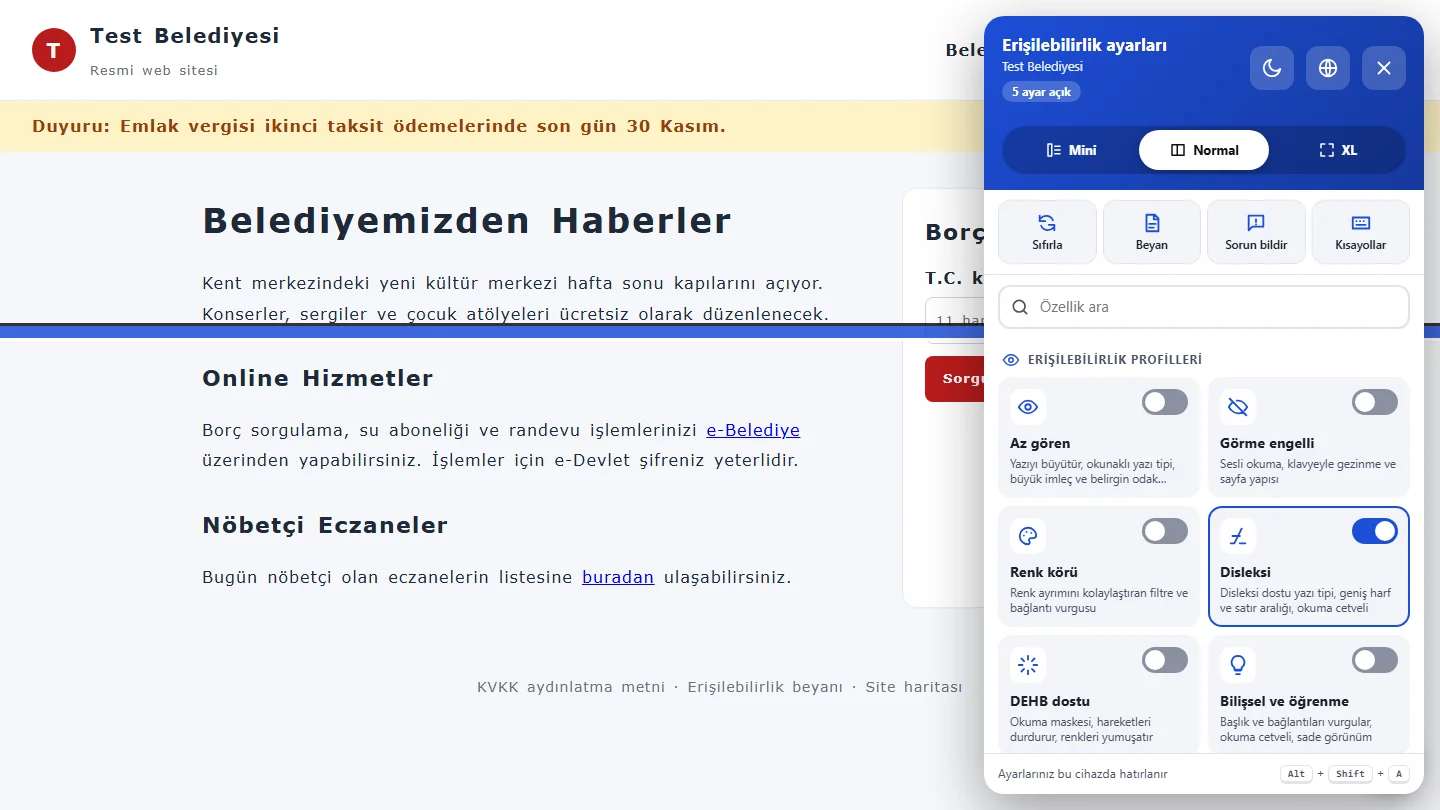
Below is the same page with the Dyslexia profile on. The dyslexia-friendly font, wider letter spacing and a reading guide that follows the line being read are all turned on together.
Individual settings
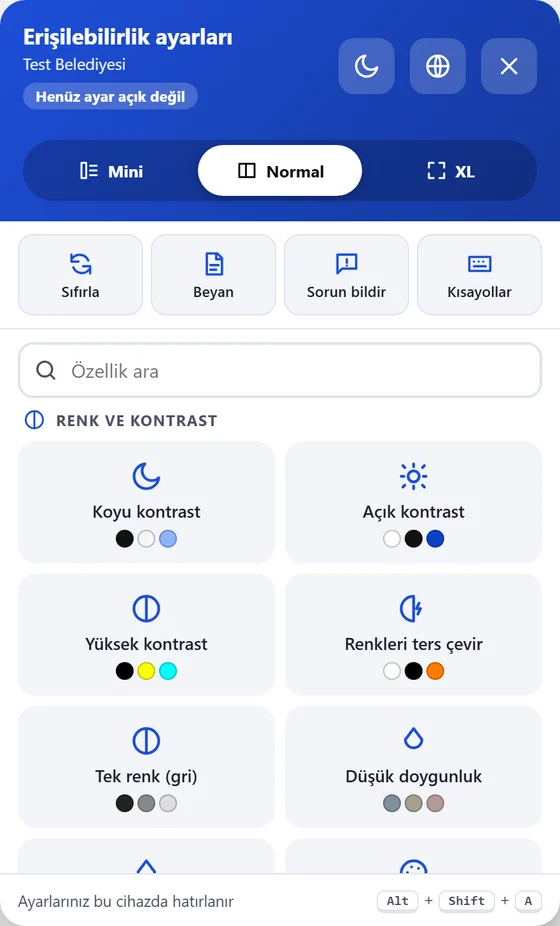
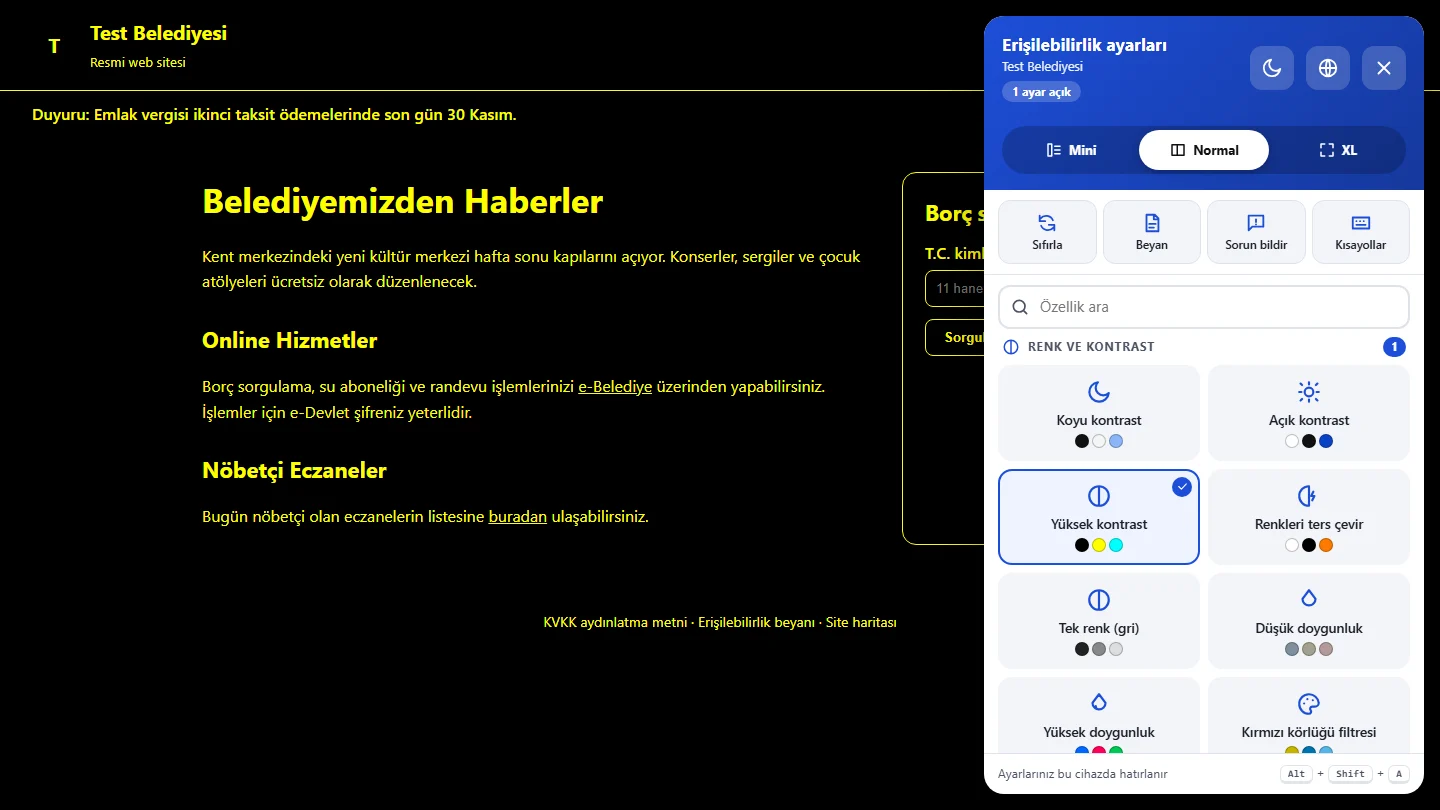
If the profiles are not enough, the visitor turns on settings one by one. It is enough to type "contrast" or "text" in the Search features box in the menu.
| Section | Settings |
|---|---|
| Text and content | Text size, page zoom, line height, letter spacing, word spacing, text align, legible font, dyslexia font, highlight headings, highlight links, text magnifier, tooltips, show image descriptions |
| Color and contrast | Dark contrast, light contrast, high contrast, invert colors, monochrome, low saturation, high saturation, protanopia, deuteranopia and tritanopia filters, custom text, heading, link and background colors |
| Reading and focus | Reading guide, reading mask, big cursor (black or white), strong focus outline |
| Calm mode | Stop animations, mute sounds, hide images |
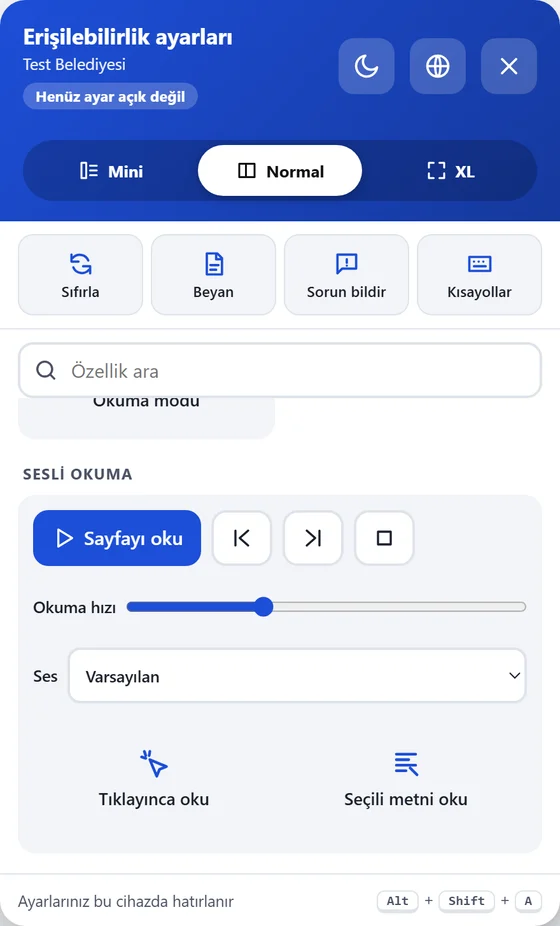
| Read aloud | Read page, previous and next sentence, speed, voice, read on click, read selection |
| Navigation | Keyboard navigation, page structure (headings, sections, links), reading mode |
The menu itself
- Mini, Normal and XL size: the menu gets smaller or bigger to suit the visitor's needs.
- Light and dark theme and five languages: Turkish, English, Arabic (right to left), German and Russian.
- Reset: one click turns off all the settings that were turned on.
- Accessibility statement: your organization's accessibility statement opens from the menu.
- Shortcuts: the menu can be used fully with the keyboard. The menu conforms to WCAG 2.2 and works with screen readers.
Reporting a problem
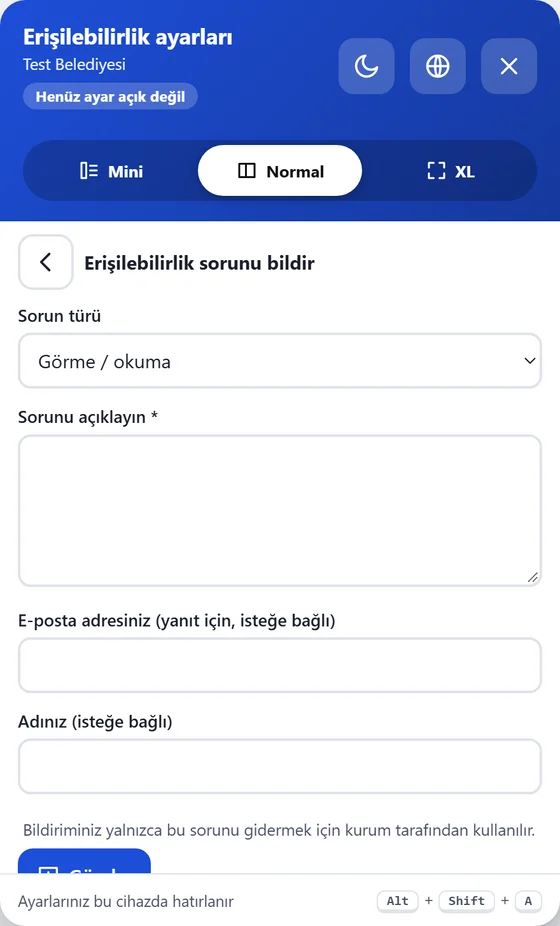
With Report an accessibility problem in the menu, the visitor tells the organization about a barrier they ran into. They choose the type of problem (vision and reading, keyboard use, screen reader, video and audio, filling in forms, other) and describe it. An email address and name for a reply are optional.
Reports arrive in the panel under the Citizens and compliance → Accessibility → Problem reports tab. You can add an internal note to a report and write a reply to the citizen. New reports also appear in the Needs attention list.
Compliance work in the panel
The Citizens and compliance → Accessibility page guides the work with a five-step roadmap. Its tabs are Overview, Toolbar, Checklist, Accessibility statement, Problem reports, Usage and Report.
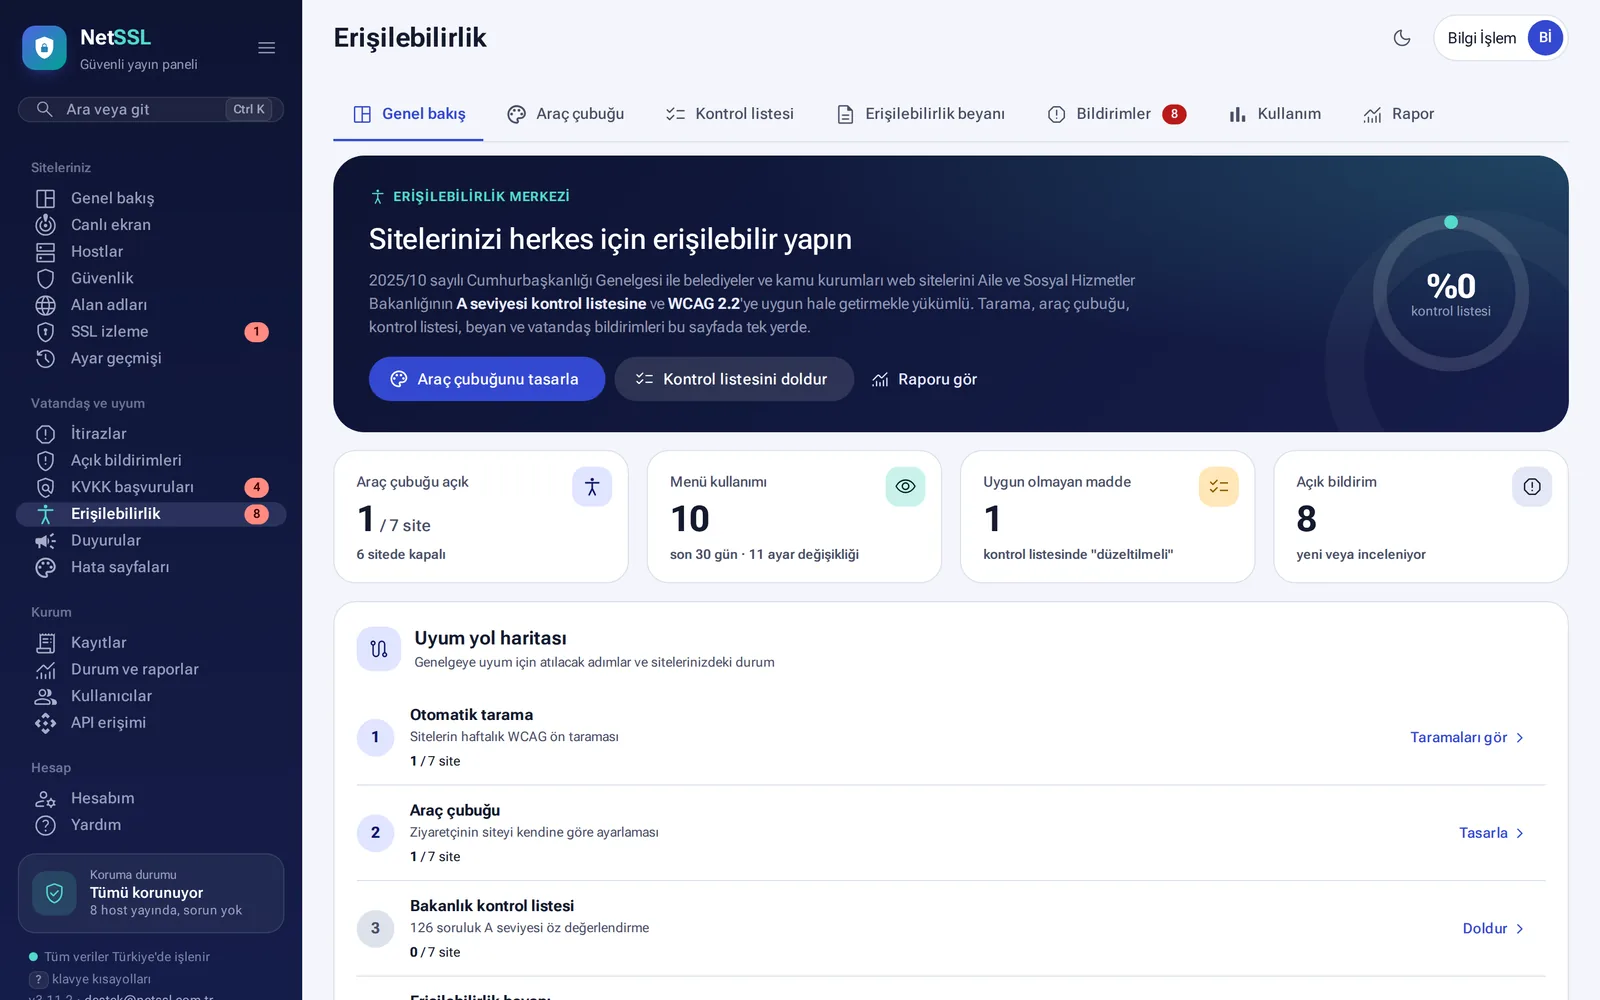
- Automatic scan: sites are scanned every week against WCAG rules and get a score out of 100. Problems are listed with their severity and the number of pages they appear on. You can download the report as Excel or CSV.
- Toolbar: you choose the button's position and its distance from the edges, the button and menu colors, the organization name, the logo and the menu language. You turn each menu feature and each accessibility profile on or off separately. The live preview shows the result right away, and one click applies the design to your other sites.
- Ministry checklist: you fill in the 126-question Level A self-assessment in the panel.
- Accessibility statement: the panel prepares it with the compliance status, the assessment method, content that is not accessible, alternative ways of access and contact details. The statement is published on a public page.
- Citizen reports: problems sent from the toolbar are answered and tracked.
The Usage tab shows how many times the toolbar was used each day, and which features and profiles were used most. The Report tab brings the priority steps, the success criteria map and the status of each site together in one report.
The toolbar makes things easier for visitors, but it does not fix problems in your site's code. The fixes listed in the scan results must be made on your site. The official compliance assessment is your organization's responsibility.
Frequently asked questions
Do we need to add code to our site?
No. NetSSL adds the toolbar to your pages automatically. You only need to turn on the switch in the panel.
Does the toolbar slow down our site?
No. It is a single script that comes from your site's own address and from the browser cache. All the work happens in the visitor's browser.
Are the settings a visitor chooses sent anywhere?
No. Settings are stored only in the visitor's browser. Read aloud also uses the browser's own speech engine, and the text being read is not sent anywhere.
Does the toolbar clash with the official site badge?
No. The badge can go in the bottom-left or bottom-right corner. If the toolbar button is at the bottom right, choose the bottom-left corner for the badge.